Ani_Butter Test Shot

which is totally useable!

Working on Sunday to pull it off. Setting up took the most of the time, and the filming was definitely less than 1 hour… But it’s totally worth it! What a lovely home of a little cube of Butter. And Kate showed magic to knit the rug. UNBELIEVABLE. It’s a magical world of cardboard and bread 😀


More to come 🙂

Ani_StopMotion Storyboard_Butter.

Butter Ani gif made by Kate!

Tried the butter today with Kate, interesting!! The tricky things is that butter melts quite easily, might need to put in back in refrigerator several time.

It’s a story about butter who’s very unsatisfied with his greasy traces, and wants to fly because of the inspiration from the butterfly!

Butter_sb_1

Butter_sb_2_v2

Butter_sb_3_v2


Here’s the sets and props.

set_and_prop


And here’s the discussion about our dilemma about choosing whether butter or origami as our character.

brainStorm_v2


PComp_4_MusicInstrument

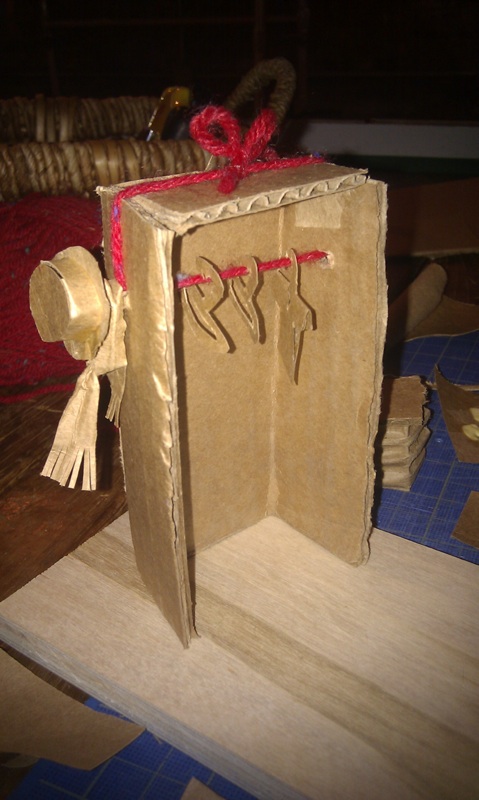
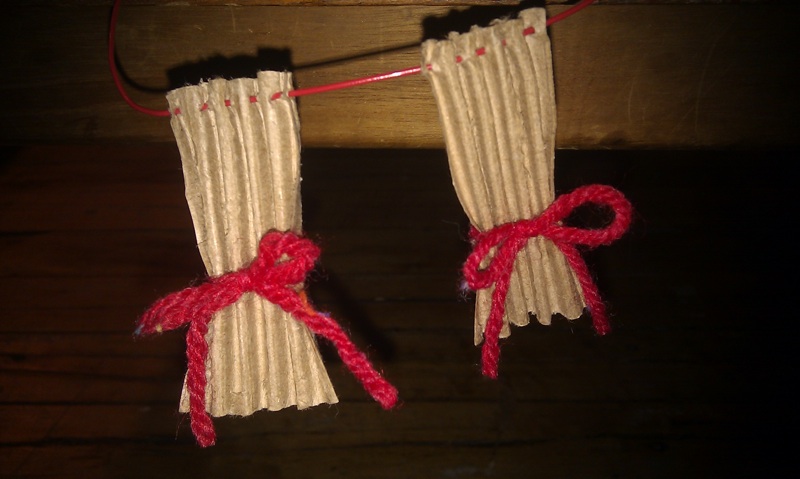
In PComp class Billy and I make a Music Instrument that can adjust the pitch by pressing and tapping. Check this out!


#include "pitches.h"

int lastButtonState = LOW;
boolean switchIsOn = false;

const int threshold = 10;
const int speakerPinNum = 8;
const int noteDuration = 20;

const int potenPinNum = 5;
int volumeAnalogValue = 0;
int volume = 0;

const int potPinNum = 2;
float saveNote;

int note[] = {
  NOTE_C4, NOTE_E4};

void setup() {
  Serial.begin(9600);
  saveNote = note[1];

}

void loop() {

  int buttonState = digitalRead(2);

  if (buttonState != lastButtonState) {
    if (buttonState == HIGH) {
      switchIsOn = !switchIsOn;
    }
  }

  lastButtonState = buttonState;

  if (switchIsOn == true) {

    int pitchRead = analogRead(0);
    int noteRead = analogRead(1);

    float pitch = map(pitchRead, 0, 950, 0, 100);

    if (pitch > 0) {
      note[1] += pitch;
    } 
    else {
      note[1] = saveNote;
    }

    Serial.print(pitch);
    Serial.print(" ");
    Serial.println(noteRead);

    if(noteRead > threshold) {
      tone(speakerPinNum, note[1], noteDuration);
    } 
  }
}

As for my review for this on Sunday, I made a basic music kit that you can control on/off, volumes, pitches(higher/lower), and tempo. But since it’s a single-note playing machine instead of templates/clip of music triggered one, it makes no difference with the changes of tempo.

MusicPractive

And thanks to almighty Moon! I got the idea of setting button-“released” as the command to adjust pitches, so that pitches won’t go crazy because of the unmeasurable amount/time of button-“pressed” when you press the button. Thank you Moon 😀

What I want to do next–

  1. make chords (office hour w/ resident booked!)
  2. play continuous clips instead of single notes
  3. be creative! not just pressing buttons… not interesting at all… go go go!

And here’s the code.

#include "pitches.h"

int lastButtonState = LOW;
boolean switchIsOn = false;

const int threshold = 600;
const int speakerPinNum = 8;
const int switchPinNum = 2;
const int higherPitchPinNum = 4;
const int lowerPitchPinNum = 3;

int pre_higherPitchRead = 0;
int pre_lowerPitchRead = 0;

const int tempoPinNum = 0;
const int noteGPinNum = 1;
const int noteEPinNum = 2;
const int noteCPinNum = 3;

const int noteDuration = 20;

int saveNote[3];
int note[] = {NOTE_C4, NOTE_E4, NOTE_G4};

void setup() {
  Serial.begin(9600);

  // save the original notes
  for (int i=0; i<3; i++) {
    saveNote[i] = note[i];
  }
}

void loop() {

  // on-off switch setting
  int buttonState = digitalRead(switchPinNum);
  if (buttonState != lastButtonState) {
    if (buttonState == HIGH) {
      switchIsOn = !switchIsOn;
    }
  }
  lastButtonState = buttonState;

  // read different notes
  int noteCRead = analogRead(noteCPinNum);
  int noteERead = analogRead(noteEPinNum);
  int noteGRead = analogRead(noteGPinNum);

  // set up duration of notes
  int tempoRead = analogRead(tempoPinNum);
  int tempo = map(tempoRead, 0, 1023, 5, 100);

  // press buttons to make notes go higher/lower 
  int higherPitchRead = digitalRead(higherPitchPinNum);
  int lowerPitchRead = digitalRead(lowerPitchPinNum);

  // when switch is on
  if (switchIsOn == true) {

    Serial.print(tempo);
    Serial.print("  ");

    // make notes go higher or lower
    for (int i=0; i<3; i++) {
      if (higherPitchRead == LOW && pre_higherPitchRead == HIGH) {
        note[i] *= 2;
      }
     if (lowerPitchRead == LOW && pre_lowerPitchRead == HIGH) {
        note[i] /= 2;
      }
      note[0] = constrain(note[0], 32, 4192);
      note[1] = constrain(note[1], 41, 5280);
      note[2] = constrain(note[2], 49, 6272);
    }

    // make sounds!
    if(noteCRead < threshold && noteERead < threshold && noteGRead < threshold) {
      for (int i=0; i<3; i++) {
        tone(speakerPinNum, note[i], tempo);
      }
    } else if(noteCRead < threshold && noteERead < threshold) {
      tone(speakerPinNum, note[0], tempo);
      tone(speakerPinNum, note[1], tempo);
    } else if(noteCRead < threshold && noteGRead < threshold) {
      tone(speakerPinNum, note[0], tempo);
      tone(speakerPinNum, note[2], tempo);
    } else if(noteGRead < threshold && noteERead < threshold) {
      tone(speakerPinNum, note[2], tempo);
      tone(speakerPinNum, note[3], tempo);
    } else if(noteCRead < threshold) {
      tone(speakerPinNum, note[0], tempo);
    } else if(noteERead < threshold) {
      tone(speakerPinNum, note[1], tempo);
    } else if(noteGRead < threshold) {
      tone(speakerPinNum, note[2], tempo);
    }

    Serial.print(note[0]);
    Serial.print(" ");
    Serial.print(note[1]);
    Serial.print(" ");
    Serial.print(note[2]);
    Serial.print(" ");
    Serial.println(" ");

  } else {
    for (int i=0; i<3; i++) {      // when swtich-off
      note[i] = saveNote[i];       // restore the original notes
    }
  }

  // remember the previouse higher/lower pitch buttons status
  pre_higherPitchRead = higherPitchRead;
  pre_lowerPitchRead = lowerPitchRead;
}

ICM_3_RainMan & Triangles

Time flies and here I am sweet ICM homework #3. It’s a collaboration work by Karam and I, and basically we just used each other’s class and try to make some interaction! I got the triangle class from Karam and background idea from Gladys, and this work was inspired by reading The Nature of Code of Daniel Shiffman. Just finished chapter 1. Super good/tough stuff!!


Here’s my new born baby(click me click me)! It’s about a person who loves being rained, just enjoys the feeling of being miserable. When rain stops, the smile stops and background went blue. You can click your mouse and make this guy happy again.

For this, I wrote 5 classes… just couldn’t stop, and hit into wall sooo many time. I was like a small rooted tree in the corner of ITP floor on Monday. And here’s are some problems(all about using class in class) and answers(except the last one) from try-and-error process of myself.

  • Where to put the moving code?
    • make sure you can control the position in the { } in which the leading moving codes(e.g. x++) settle
  • If things moves in different way?
    • put moving codes separately in its own class
  • Wants rains start from cloud
    • don’t need to declare Cloud class in Rain class!! can use it directly(tearing)
  • How to make smile affected by rain????

Still can’t solve the last problem. I guess there must be something wrong about my rain drops. I use distance between each rain drop and the man’s head to write some condition codes. The rain drops may seem to be affected well by the man, but I bet it’s actually not what we think they are, and that’s why although I could affect rain drops with the man, I failed to affect the smile with the rain drops? Too complicated. So in the end, I compromised and made the man smile when it’s raining and sad when it’s not.

Maybe it’s time to book an office hour with Dan.

And as usual, below are my baby’s bloody organs(codes).

Continue reading

V&S_02_CookYouAll

Audio recording project of Neva and me!

Do you feel being cooked?

Neva and I wanted to play sound with space and left/right tracks to build up an environment in which the audience would feel being cooked, burned, sprayed on, drank etc..

CookYouAll

CookYouAll

Except the intro music and high heels sound, we recorded every pieces in Neva’s place. And then we used Pro Tool to edit.  Thanks to the advice from teacher Craig, we edited whole piece at first, and then decided which one goes to Ceiling or Floor, which one goes to right or left soundtrack. And for some of the sound pieces , like rolling, we cut one single sound into pieces, and assigned them one after one into the right and left soundtrack.

In the end, the effect is quite good! We did create a 3D sound effect and it’s really interesting to hear our work delivered by 4 stereos(Much better than listening through computer).

Below are our fun time documentation!

boilingSoundme_eatingSoundneva_recordingwe_recordingplum listens to appledraftproTool

ICM_02_CloudPaint

This is the idea of Caitlin and I, a self-made Paint software, for ICM week_02’s homework, making something animated and designed an UI. At first, we were ambitious and made a ideal Paint with multiple function, and even a fancy UI. BUT, it’s just too hard to accomplish 😉  Process of bloody stumbling is as followed:

  1. made 3 floating cubes to choose colors from.
  2. frustrated to find out that the color of every cube’s rim changed when I choose different stroke color.
  3. same thing happened in stroke width.
  4. P A N I C .
  5. Struggling for hours.
  6. thought object-orientation program might be the answer of this puzzle, so started learning OOP from scratch.
  7. excited to have a workable class of drifting clouds.
  8. frustrated to find out that problem still existed.
  9. P A N I C .
  10. Struggling for hours.
  11. so desperate that I started googling my problem.
  12. found out the existence of pushStyle()/popStyle()!
  13. had a bitter(FXCK!)-yet-sweet(YAH!) moment for a while.
  14. added stroke width, eraser, and new paper function to finish my mini-Paint.
  15. L E A R N E D    A    L O T .

And here’s my bloody baby!(click me click me click me)

And below are my bloody baby’s organs(codes).

Continue reading

PComp_03_MouseControl

Just have to say… Intro to Physical Computation is the most confusing and yet the most rewarding class I have in ITP so far. Problems and questions appear like bubbles from the boiling water, and when Tom Igoe explained the INPUT and INPUT_PULLUP to me in class, I felt my brain was stirred like a sticky mud. But once problems were sold, I felt I was in heaven.

Lab_02 before week_03_class

First_Arduino!!

It’s a bitter(FXCK!)-yet-sweet(YAH!) feeling when you found out that the whole problem was actually arose from a super simple reason! Frustrating about my first attempt to program Arduino and then finding LEDs failing to light up because of wrong direction. Anyway, YAH for the light!!!

During the self-labs, in the beginning I was really confused about the different wiring ways showed in the instructions, and I pondered deeply about it.


As pics show above, resistors were put in the different places. And then I just thought that, hey! why don’t I just try to wire it in different ways and see if it gives same result? And I tried and it did. Silly and happy.

Arduino_Lab_Test

Week_03_MouseControl

Billy and I used Joystick to control x and y. And quoting from Tom:

“… The joystick select button is a digital input, but it’s wired differently than the buttons you saw in the Digital Lab or the Mouse Control With Pushbuttons Lab. It’s wired to connect to ground when you press it. To read it, then, you’d still use digitalWrite(), but you’d expect it to go low when pressed instead of high. And instead of a pulldown resistor like you’ve used in those other two labs, you’d use a pullup resistor, so that it’s connected to 5V when the switch is not open…. … The Arduino has built-in pullup resistors that you can use on the digital inputs. When you set the pin to be an input using the pinMode() command, use the parameter INPUT_PULLUP instead of INPUT.”

So at first we wrote the press of Joystick as pinMode(3, INPUT_PULLUP), but then we found that it’s actually difficult to control x, y and press in one single stick, so we decided to add another button as the right-click-mouse. We changed back the code about digitalInput as pinMode(3, INPUT) and adjusted the related code below as well. Also, we used map() to control the speed of the mouse movement since delay() will change the entire loop speed and it’s not necessary.

inClass_MouseControl

One thing I also want to mention is that, in class classmates came out a lot of ideas about how to control the mouse. With string sensors, force sensors, tilt sensors, buttons connected with different resistors, etc. Very creative!!! I was kind of shocked yet inspired at the same time. Maybe I should stop playing safe. Just let go my imagination first, and then try to catch its tail and fly with it carelessly after???

Very interesting 🙂

PComp_02_Zoetrope

PComp_week_02_Zoetrope from JHCLaura on Vimeo.

In the 2nd class of PComp, Aaron and I made a zoetrope which is energized by a motor. So exciting!! If I were not in the class I would give it a happy shriek! This work was majorly done by talented Aaron since I haven’t got my Arduino Starter kit yet, and I borrowed one at 1 AM which is just 8 hours before the class… tragedy. Anyway, thank you Aaron!

At first, our zoetrope worked with only a potentiometer, and since we haven’t learned how to use it to get a variable supply yet but simply a on-and-off switch, we couldn’t control the speed of the motor, so it turned too fast for a clear animation. To solve this problem, Tom Igoe suggested adding a momentary switch to supply power by clicking it manually.

At first, we couldn’t make it right because we misunderstood the flow of the current. Thanks to Jason we got it done eventually. And here are some detailed pics of our work!